YOGASAN
3 Quick Yoga Aasans
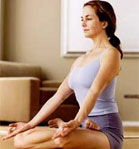
- This is the classic lotus pose, in which one has to sit with both legs crossed, and ankles placed on the opposite thigh.
- Keep your back straight, and your hands stretched out in front of you on both knees, without bending them at the ankles.

This pose is excellent for the spine, kidneys, abdomen and pelvis. In fact, it is supposed to be one of the most beneficial yogic poses. It also eases the pain of childbirth, so if you are planning a pregnancy, it makes sense to start doing the padmasan starting from now!

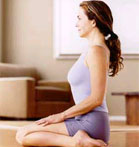
- Sit on the mattress with your legs stretched out in front.
- Bend your legs at the knees and bring them under you.
- Sit on your heels.
- Slowly flatten your feet, parting them slightly at the ankles, till your buttocks are resting on the underside of your feet.

- Sit, keeping your legs stretched out straight in front of you.
- Bend your left knee outward, bringing your left foot inward so it rests against your inner right thigh and groin.
- Bend forward till you touch the toes of your right foot, without bending the right knee.
- Keep stretching till you touch your head to your knees. This may not be possible initially, and would take a few days of practice.
- Repeat with the left foot.
- Once you've done this, you could try touching your head to your knees with both feet stretched out straight in front of you. This is even harder to achieve.
- Stretch gradually. Don't jerk. This will only injure your ligaments defeating the purpose.
Pranayama
We all know that deep breathing is beneficial. However, deep breathing doesn't just mean a deep inhalation, but it also means a complete exhalation. Remember to give equal importance to exhaling, and make sure all the breath is completely expelled from your body, because only then will your body be able to accept the fresh air drawn in.
These exercises should not be done immediately after meals. Wait at least three hours after a meal. The best time to do Pranayama is early in the morning, before breakfast.
Abdominal Breathing
- Sit in Padmasana (lotus position) or Vajrasana, whatever feels more comfortable. If you cannot manage either, sit cross-legged.
- Be sure you keep your spine straight all the time, or the Pranayama will not be as beneficial.
- Take a deep breath, and as you inhale, expand your stomach as far as is comfortable. (The natural response may be to pull in the stomach while inhaling.) Feel the breath enter your abdomen.
- Pull in your stomach while exhaling, expelling all the breath from deep within.
- Breathe silently with your nose, not your mouth.
- Don't overdo it. Take around 15 breaths in this manner.
After you have completed 15 breaths, go on to the next exercise.
Ribcage breathing
In this exercise you will attempt to feel your rib cage expand with each breath.
- Place your hands a little above your waist, on your ribs, with four of your fingers resting on your ribcage facing the fingers of the opposite hand, and the thumb, resting on the sides.
- Contract your stomach muscles, so the air does not escape into the stomach. As you develop more practice you will not need to contract your stomach muscles, but it makes sense to contract them in the initial stages.
- Inhale and feel your rib cage expand to the sides and to the front. Exhale, and feel the cage collapse. Do this exercise 15 times, and try and breathe silently through the exercise. Although you should concentrate on yourbreathing, you should not hear yourself breathe.
High breathing
This breathing technique involves the raising of the collarbones.
- Place the fingers of each hand on the corresponding shoulder.
- Keep your stomach muscles immobilized or contracted, as you did in the previous exercise.
- Now, take a breath, attempting to raise your collarbones slightly. Do not raise your shoulders, although you may move them slightly backwards with each inhalation.
- This form of breathing essentially comes naturally to most people, and is a shallow form of breathing. On a daily basis, attempt to breathe more deeply. This form of breathing however is good when incorporated in pranayam.
The health benefits of Surya Namaskar
We are aware about the advantages of practicing yoga, pranayama, and meditation to lead healthy life. Sun salutation exercise is beneficial in many ways. Read on to know the health benefits of Surya Namaskar. It is a good exercise to stay in shape.
Ramesh wakes up before the sun rises. He climbs the stairs that take him to the terrace of his building. The gentle morning sunrays make him feel good. He unfolds his yoga mat and start doing Surya Namaskar. His day starts with sun salutation exercise that ends with pranayama and meditation. He feels fresh and enthusiastic throughout the day. Following are the health benefits of practicing Surya Namaskar regularly.
- Surya Namaskar consists of 12 different bodily postures that ought to be performed in particular sequence.
- Practicing Surya Namaskar is beneficial for the health of digestive system. It stretches the abdominal muscles. Regular practice of Surya Namaskar helps to lose excessive belly fat and gives flat stomach.
- Surya Namaskar is the ideal exercise to cope with insomnia and related disorders. Surya Namaskar practice calms the mind, thus helps to get sound sleep.
- Surya Namaskar practice regulates irregular menstrual cycles. Practicing Surya Namaskar ensures the easy childbirth. It helps to decrease the fear of pregnancy and childbirth.
- Surya Namaskar practice boosts blood circulation and helps to prevent hair graying, hair fall, and dandruff. It also improves the growth of hair making it long.
- Regular practice of Surya Namaskar helps to lose extra calories and reduce fat. It helps to stay thin. Practicing Surya Namaskar is the easiest way to be in shape.
- Sun salutation exercise helps to add glow on your face making facial skin radiant and ageless. It is the natural solution to prevent onset of wrinkles.
- Regular practice of sun salutation boosts endurance power. It gives vitality and strength. It also reduces the feeling of restlessness and anxiety.
- Daily practice of Surya Namaskar makes body flexible. It improves flexibility in spine and in limbs.
The 12 mantras for Surya Namaskar
12 mantras for Surya Namaskar are the auspicious mantras (chants). One should recite one mantra after completing one round of Surya Namaskar. Some people prefer to recite Gayantri Mantra after doing sun salutations. Following are the 12 mantras to recite while performing sun salutation.
- Aum mitraya namah
- Aum ravaye namah
- Aum suryaya namah
- Aum bhanave namah
- Aum khagaya namah
- Aum pushne namah
- Aum hiranyagarbhaya namah
- Aum marichaye namah
- Aum adityaya namah
- Aum savitre namah
- Aum arkaya namah
- Aum bhaskaraya namah
Surya Namaskar every morning.
Do you want to be fit for life? Yoga is the way to go. Start out by doing the Surya Namaskar every morning.
Yoga has hit the mainstream, and is the next cool thing on the block. Ever since Madonna's started talking about it, the entire world is queuing up for
their first headstand. More and more people all around the world are discovering its health and spiritual benefits. So isn't it about time you gave this fantastic practice a shot?
What you will need
A quiet room, an uncarpeted floor, a towel, sheet, mat or chatai.
When should you do it
The earlier, the better. It's best if you do it the first thing in the morning, after attending to your daily rituals. Do the Surya Namaskar before eating
anything though, or you'll be sorry!!
The Steps
- Stand at the top of your mat or towel with your feet together and your hands in the Namaste position, in front of your chest.
- Breathing IN, extend your hands straight above your head. Arch your back slightly till you feel the stretch in your spine.
- Breathing OUT, bend down as far as possible. Try to touch your toes without bending your knees.
- Breathe IN. Bend your left knee and keeping your left foot in front, stretch your right leg out behind you. Keep the right kneeon the floor. Lift your head and look straight ahead.
- Hold your breath, straighten your left leg also behind you, so now both legs are stretched behind you. Lower yourself slightly, so you are in a push-up pose, with elbows straight.
- Bend your elbows and lower yourself, keeping your stomach and butt off the floor. You can touch your chest and the rest of your body to the mat.
- Lift yourself up chest-first, straightening your elbows.
- Exhale. Lift yourself up keeping your hands on the floor, forming a V-shape with your body.
- Inhale. Put your right foot in front with your left foot at the back, with the left knee on the floor. Look straight ahead.
- As you exhale, bring your left foot forward in line with the right foot. Stand and bend forward, touching hands to your toes. If you can't touch your toes, don't worry. It's just a matter of time before you will be able to. And if you can touch them easily, try touching your head to your knees.
- Inhale. Keep your feet together and lean back, stretching your arms behind you.
- Exhale. Come back to the center with your arms at your sides.
Repeat the Surya Namskar about 5 to 7 times, and keep alternating your legs.
A few final words
Remember, this is just the beginning - you're only getting warmed up. Keep a look out for our next aasan. We're going to make you have your legs crossed around your head and going 'Ommmmmmmmmmmmmmm' before you know it...


.jpg)
No comments:
Post a Comment